Animated GIFs serve as a bridge between static imagery and long-form video. They are efficient at capturing attention in digital spaces where users move quickly, and they offer a unique way to convey emotion or illustrate a process without requiring the user to hit play. Understanding how to create a GIF in Photoshop is a valuable skill for any brand looking to enhance its visual communication. This Photoshop tutorial will guide you through the entire workflow, ensuring your digital marketing visual assets are both engaging and technically sound.
Preparing Your Assets
Creating a high-quality animation begins with rigorous organization. Before you even open Photoshop, you need to ensure your source material is ready for import. If you are working with a series of pre-rendered images, such as screenshots, hand-drawn frames, or exported assets from another design tool, keep them in a dedicated, clearly labeled folder. This prevents accidental inclusion of unwanted files and ensures the correct chronological order during import.
In Photoshop, go to File, select Scripts, and choose Load Files Into Stack. This powerful feature imports your images as individual layers within a single document. This process serves as the foundation for your animation, allowing you to view and edit all frames simultaneously. If you are starting from scratch within Photoshop, create each frame on a new layer by navigating to Layer, selecting New, and choosing Layer. This method is ideal for animations created directly in the software, such as text animations or simple graphic movements.
Organizing Layers for Efficiency
Renaming these layers in the Layers panel is a practical step that prevents confusion as your animation grows in complexity. Default names like “Layer 1” or “Layer 2” become difficult to manage once you have dozens of frames. Instead, adopt a naming convention that reflects the content or sequence, such as “Frame_01,” “Frame_02,” or descriptive titles like “Intro_Text” and “Logo_Appear.” This clarity is crucial when you need to adjust specific frames later in the process.
Additionally, consider grouping related layers. If your animation includes background elements that remain static while foreground elements move, place the background layers in a group labeled “Background.” This keeps your Layers panel tidy and allows you to toggle visibility for entire sections of your composition. Proper layer management not only speeds up the creation process but also makes it easier to collaborate with other designers or return to the project weeks later.
Setting Up the Timeline
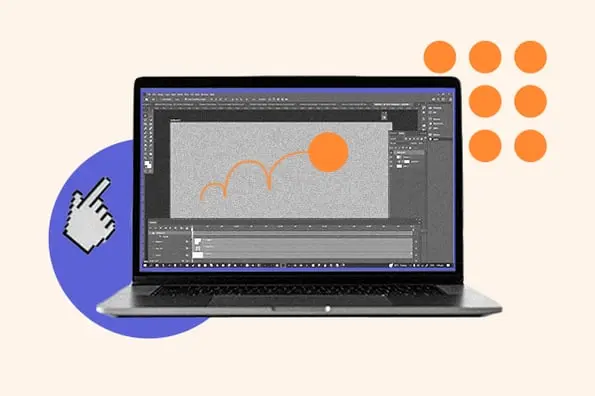
Once your layers are organized, the Timeline window becomes your primary workspace for animation. Access this by selecting Window and then Timeline from the top navigation bar. When the panel appears at the bottom of your screen, you will likely see a default video timeline. Ensure you select Create Frame Animation from the dropdown menu or the button within the panel. Clicking this button is essential, as it activates the frame-specific controls needed to manipulate your layers over time.
Your workspace is now ready for the animation sequence. The Timeline panel will display a single frame by default. This frame represents the current state of your document. As you add more frames, you will be able to control the visibility of layers for each specific moment in the animation. This shift from a spatial view (layers) to a temporal view (frames) is the core concept behind creating frame animation in Photoshop.
Understanding the Timeline Interface
Familiarize yourself with the key elements of the Timeline panel. On the left, you will see the frame thumbnails, which provide a visual preview of each step in your sequence. Below each thumbnail is the delay time, which determines how long that frame is displayed. To the right of each frame, you will see eye icons for each layer. These icons allow you to toggle the visibility of specific layers for that particular frame.
It is important to note that changes made to a layer in one frame do not automatically carry over to the next unless explicitly copied. This non-destructive workflow allows for precise control. For example, if you want a layer to appear only in the third frame, you simply turn on the eye icon for that layer in the third frame and keep it off in the first and second frames. This granular control is what makes Photoshop a powerful tool for creating complex animations without altering the original layer data.
Converting Layers to Frames
To transform your static layers into a cohesive animation, you must first ensure all relevant layers are selected. Navigate to Select and choose All Layers. This step is critical because the conversion process relies on the current selection to determine which elements become part of the animation. If you have hidden layers or groups that are not part of the final GIF, deselect them before proceeding to avoid unnecessary file size bloat.
Next, locate the menu icon on the right side of the Timeline panel. From the dropdown list, select Create new layer for each new frame. Immediately following this, open that same menu again and select Make Frames From Layers. This action automatically assigns each of your layers to a unique frame in your sequence, effectively building the structure of your GIF. The order of the frames will correspond to the order of the layers in the Layers panel, from top to bottom.
Managing Frame Order and Visibility
After the conversion, review the Timeline to ensure the sequence matches your intent. If the order is incorrect, you can drag and drop frames within the Timeline to rearrange them. This flexibility allows you to experiment with different pacing and narrative structures without having to rebuild the layers. However, be cautious when dragging frames, as it can affect the visibility settings of the layers within those frames.
If you notice that certain layers are visible in frames where they should not be, you can manually adjust the eye icons. For instance, if a background layer is visible in all frames but you want it to fade out, you might need to duplicate that layer and adjust its opacity in subsequent frames. This manual adjustment gives you fine-grained control over the animation’s flow, ensuring that each transition is smooth and intentional.
Refining the Animation
Precision matters when defining how your animation flows. Underneath each frame in the Timeline, you will see a time duration indicator. Clicking this allows you to set the delay, or how long each frame remains visible before transitioning to the next. A common starting point is 0.5 seconds, but you should adjust this based on the pacing you desire. Faster delays create a more energetic, snappy feel, while slower delays allow the viewer to absorb more detail.
Additionally, at the bottom of the toolbar, you can specify the loop count. Setting this to Forever ensures the animation continues to play, which is typically the standard for web-based GIFs. If you are creating an animation for a specific context where a single playthrough is preferred, you can set the loop count to 1 or any other number. This setting is crucial for user experience, as infinite loops can sometimes be distracting if not used appropriately.
Adjusting Timing for Impact
To achieve a professional look, consider varying the delay times across different frames. For example, you might want a static title card to remain on screen for 2 seconds, allowing the viewer to read the text, while the subsequent action sequence moves faster with 0.1-second delays. This variation in timing adds rhythm and emphasis to your animation, guiding the viewer’s attention to key moments.
You can also use the “Copy Frames” and “Paste Frames” functions in the Timeline menu to duplicate timing settings. If you have a sequence that repeats, such as a blinking cursor or a pulsing button, you can copy the frame settings and paste them to subsequent frames, saving time and ensuring consistency. This efficiency is particularly useful for animations with repetitive elements, allowing you to focus on the unique aspects of the design.
Preview and Export
Before finalizing your work, use the play icon in the Timeline panel to preview the animation. This step allows you to check for timing issues or layer visibility errors. Watch the animation closely, paying attention to transitions and the overall flow. If something feels off, pause the playback and adjust the relevant frames. This iterative process of previewing and refining is essential for creating a polished final product.
When you are satisfied with the result, navigate to File, select Export, and choose Save for Web (Legacy). In the export dialog, select your preferred GIF preset. If your animation contains gradients, consider using Dithered GIFs to minimize color banding. Keep in mind that higher dithering settings improve visual detail but increase the final file size, so aim for a balance that maintains quality while ensuring quick loading times.
Optimizing File Size and Quality
The Save for Web (Legacy) dialog offers several options for optimizing your GIF. The Colors dropdown allows you to reduce the number of colors in the animation, which can significantly decrease file size. Start with 128 colors and reduce until you see noticeable degradation in quality. The Dither percentage controls how Photoshop handles the reduction in colors; a setting between 50% and 80% often provides a good balance.
Another critical setting is the Looping Options. Ensure this is set to Forever if you want the animation to repeat indefinitely. You can also preview the estimated file size at the bottom of the dialog. If the file is too large for your intended use, consider reducing the dimensions of the canvas or further optimizing the color settings. A smaller file size ensures faster loading times, which is crucial for maintaining user engagement on web pages and social media platforms.
Integrating GIFs into Your Marketing Strategy
Animated GIFs are versatile assets that function well across various digital touchpoints. On social media platforms, they offer a way to break through the noise of static feeds. Users are more likely to stop scrolling when they encounter motion, making GIFs an effective tool for increasing visibility and engagement. Platforms like Twitter, LinkedIn, and Slack support GIFs natively, allowing for seamless integration into conversations and posts.
In email marketing, replacing a standard image with an animation can increase engagement and direct attention to key information. A subtle animation, such as a button that pulses or a product that rotates, can draw the eye to the call-to-action, potentially boosting click-through rates. However, it is important to keep animations subtle and relevant to avoid distracting the reader from the main message.
Strategic Use Cases for Engagement
Webpages and blog posts also benefit from this format, as GIFs can simplify complex topics or draw the eye to specific areas of a page. For example, a tutorial blog post can use a GIF to demonstrate a software feature in action, providing a clearer explanation than static screenshots alone. This visual aid enhances the user experience by reducing cognitive load and making the content more accessible.
By incorporating these elements thoughtfully, you can provide a more dynamic experience for your audience without overwhelming them with heavy video files. The decision to use animation should always be guided by the intent to provide clarity or enhance the narrative of your content. Avoid using GIFs purely for decoration; instead, use them to support your message and improve communication. This strategic approach ensures that your animated GIFs contribute positively to your overall digital marketing visual strategy.





